Wednesday 19th September was International ‘Talk Like A Pirate’ Day, however Flinders University, Ships: Research, Recording and Reconstruction students were learning the language of shipwrights. During the one week intensive course led by maritime archaeology lecturer, Dr Wendy van Duivenvoorde, 15 internal and external undergraduate, postgraduate and short course students learnt the basics of ships lines, timber fragment recording and calculating co-efficients.
On Wednesday and Thursday, the students were divided into two groups and took it in turns to record the port and starboard ships lines of the historic 1950s Cadet dinghy, Noctoo, part of the South Australian Maritime Museum collection. Noctoo is a clinker built vessel, meaning the planks are overlapped rather than flush with each other (Figure 1).
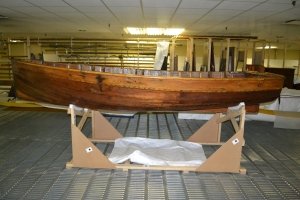
Figure 1: Noctoo resting in its cradle at South Australia Maritime Museum storage. (W. van Duivenvoorde 9 September 2012).
Under the guidance of the ever patient and encouraging Bill Leonard, Curator in Maritime History at the Western Australian Museum and master shipwright of the Endeavour and Duyfken reconstructions, the class learnt how to take ships lines using a traditional method: joggle sticks. After establishing a centre line from the bow to the stern of the vessel, four stations were set up at a quarter, half and three quarters of the length of the vessel, with the fourth at the transom (Figure 2).
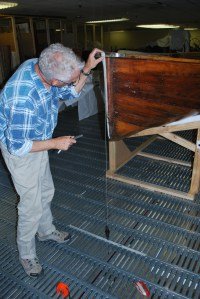
Figure 2: Bill Leonard establishing the centre line using a plumb bob. (W. van Duivenvoorde 19 September 2012).
A right-angled board was held perpendicular to the vessel at the station being recorded and the joggle stick was placed on the point to be recorded, usually the edge of a plank or where one plank met another. The outline of the joggle stick was traced where it met the perpendicular board, a process which took many hands to ensure accuracy (Figure 3). This continued until all the points at one station were drawn.
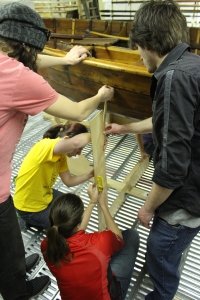
Figure 3: Michael, Caitlin, Maddy and Matt using a joggle stick to record the position of a planking edge. (M. Polzer 20 September 2012).
Then the board was placed onto a large sheet of MDF and the joggle stick was lined up with the tracing. A dot was made on the MDF where the point was (Figure 4).
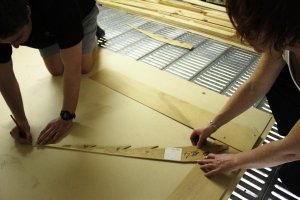
Figure 4: Kurt and Janet marking the joggle stick position on the MDF board. (M. Polzer 20 September 2012).
After all the points were added they were joined up and the outside shape of the clinker planking could be seen. For ship lines, however, the moulded dimensions are needed, which is the inside the planking. As the planking was 10mm thick, 10mm was taken off the drawing. Then, using a spline, a fair curve could be drawn through the points (Figure 5). It was from this curve that dimensions were taken to create the lines drawing.

Figure 5: Gay, Caitlin and Michael fairing the curve using a spline. Many hands make light work. (M. Polzer 20 September 2012).
Three water lines were established and the distance from each of these to the centre line, as well as the distance from the sheer line to the centre line and the height from the baseline to the sheer line were recorded (Figure 6). The sided (width) and moulded (depth) dimensions of the keel and skeg were also taken. This process was repeated at each station.
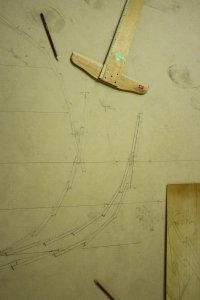
Figure 6: Recording three stations on the MDF completed. The horizontal water lines can be seen. (M. Polzer 20 September 2012).
Students were also able to try other techniques for taking ships lines, including a goniometer and laser (Figure 7).
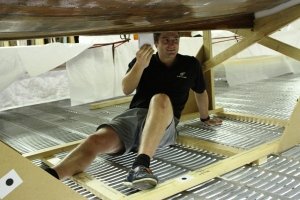
Figure 7: Kurt holding a piece of white paper to give the laser something to reflect off. (M. Polzer 20 September 2012).
Following the recording of the vessel, each student produced a ships lines drawing. A lines drawing consists of three views of the vessel: the sheer plan, half-breadth plan and body plan (Figure 8). Each view shows the station lines, water lines and buttock lines of the vessel, as well as the sheer line. During this process it became evident that an eraser is the most valuable tool in the drafting toolkit.
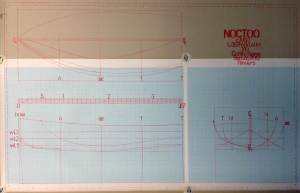
Figure 8: Caitlin’s lines drawing of Noctoo showing sheer plan (bottom left), half-breadth plan (top left) and body plan (bottom right). (W. van Duivenvoorde 25 September 2012).
Other highlights during the course included learning about sails and rigging from traditional sail maker Don Lucas. The effort and attention to detail that goes into making sails was surprising to many.
By the end of the week students were able to understand the difference between a hog and a skeg, a luff and a leech, and a buttock line and a water line. Many thanks to Emily Jateff from the South Australian Maritime Museum for giving us the opportunity to translate what we were learning on paper into practice, by recording Noctoo. Also thanks to all the guest lecturers: Bill Leonard, Don Lucas and Mark Polzer.

